How to use Sales Types
You can select Sales Type for transactions in CPS Air. Sales Type allows waitstaff to select an option which will print out on the ticket sent to the kitchen. This has a couple of practical uses such as determining how an order should be packaged, such as HERE or To-Go orders, and where an order was placed.
Example: A course uses Sales Type to determine where an order was placed. Their pool area has multiple sections, so they use the Sales Type to print the location on the order ticket so the servers know where the order should go.
Note: You can always add notes to sales, but that information can only be found by looking up the sale later.
To set up the Sales Type in CPS
Adding a new Sales Type
- In Tools | Options , go to Reference Tables | Sales Types. The Sales Types screen displays to the right.
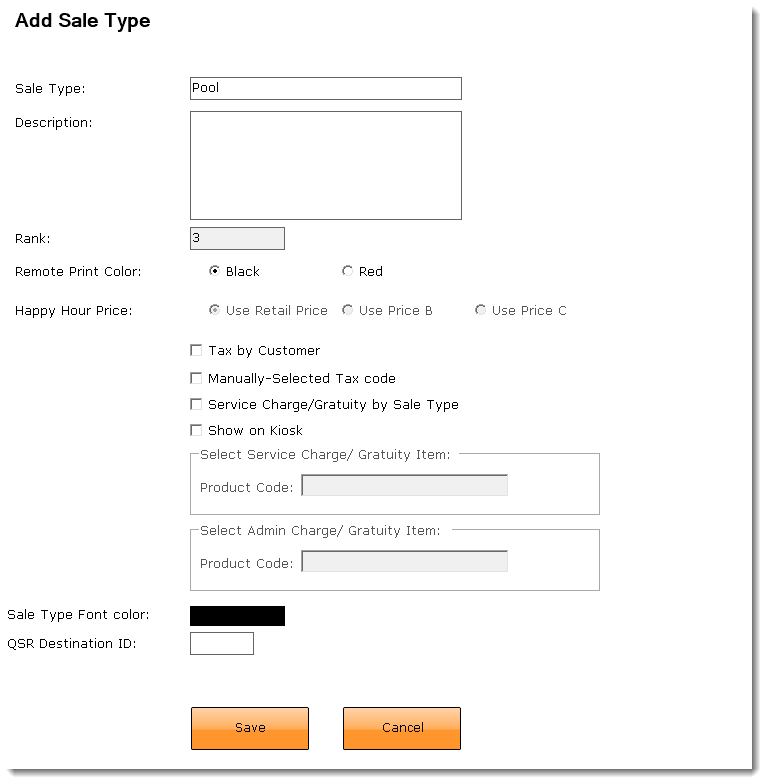
- Click Add to the right of the list box. The Add Sale Type screen displays.
-
In the Sales Type field, enter a name for this type of sale, such as Pool Side or Take Out, and in the Description field, enter a description for the Sales Type (optional).
Note: The Rank is assigned by the system.
-
Select the desired Remote Printer Color radio button and Happy Hour Price radio button if that is available to you.
Setting your default Sales Type for the iPad Terminal
-
In Tools | Options, go to Reference Tables | Terminal Information. The Terminal Information screen displays to the right with a list of terminals you have set up. If you are setting up a terminal for the first time or you need your iPad set up as a terminal, contact CPS.
-
Double-click the name of your iPad which has been set up for as a terminal using CPS Air.
-
Click the iOS Setting tab to the right of the Terminal Settings tab at the top of the screen. The iOS settings display. What iOS Setting tab?

-
In the Default Sale Type section, select from the Sale Type drop-down list, the type of sale that the iPad running Air will be making.

- If you want to force the employee making the sale to select the type of sale this is when finalizing the tab, select the Force Sale Type selection upon Finalized checkbox. The default will be checked in a pop-up screen but the other sales types will be available to select from the pop-up screen.
- Select Save at the bottom right side of this screen.
- On the iPad, reconnect again for the changes to take place.
The next time you select Save Tab, the Sales Type default or ranked at #1 will display in the lower right corner of the screen, and the kitchen printer, if necessary, will print out a ticket with the sales type on it.